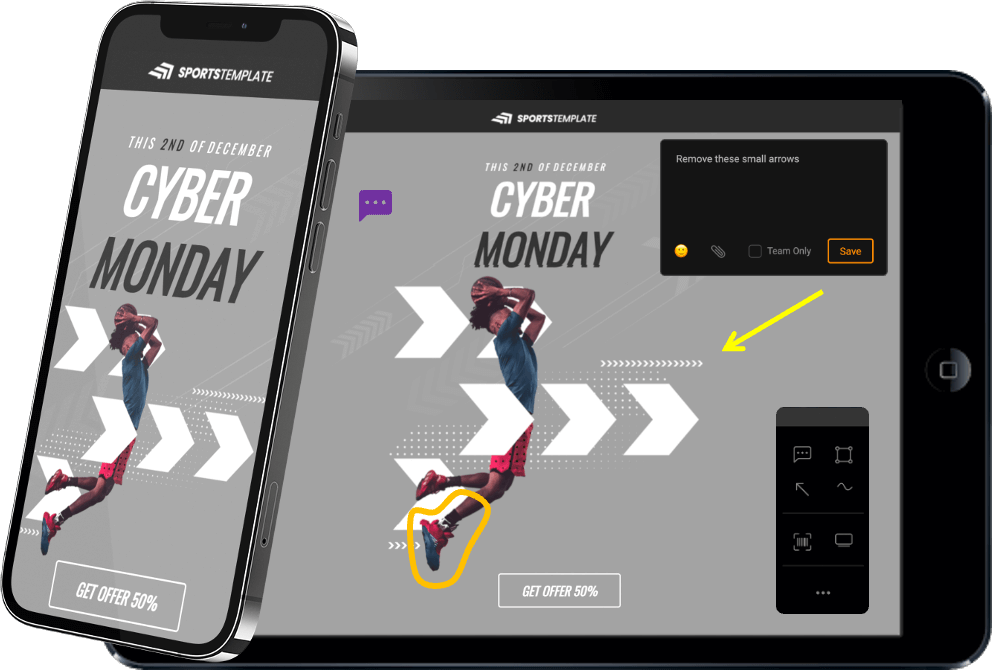
With QuickReviewer, you can collaboratively review live websites on the internet, the same way you do with HTML ZIP files and images. This includes websites, mailers, themes, banners, newsletter, ecommerce sites and more.
Website review is different from HTML review. While you are required to upload HTML package as a ZIP archive to be able to share with collaborators/reviewers, the Live Website review feature lets you review HTML pages right from where they are hosted.
Before you can start sharing your Website for review with collaborators, a little prep is needed.
WordPress Websites
If you are planning to share a WordPress site for review, add the QuickReviewer HTML Review Plugin to your WordPress website using the following steps:
- Step 1: Login to your WordPress admin console.
- Step 2: Go to plugins -> Add New
- Step 3: Search for QuickReviewer HTML Review Plugin
- Step 4: Click on Add.
If for any reason you are not able to locate the plugin, you can find it at QuickReviewer HTML Review Plugin
Other HTML based websites
Copy and paste this code snippet into every page of your website in the <head> tag. Or, if you are using a common html for the header of your page, paste the code into the header file.
<script src="//app.quickreviewer.com/proof/webproof/qrv2.js" defer></script>
This script allows the QuickReviewer proofing window to iFrame your website. It ensures that when the user navigates on your web page, QuickReviewer is informed so that it can react accordingly. We do not track or store any website information.
What if I forgot to include the script/plugin?
When you add a Website URL, QuickReviewer reminds you to add the plugin or code. If you go ahead anyway, QuickReviewer gives a warning when the proofing window is launched. You can still preview your website, but not mark comments.
You can add the plugin or script to your website at any time to allow commenting and reviewing. There is no need to add the Website again.
NOTE: In order for the website proofing to work, QuickReviewer iframes the website. If you are unable to see the page preview, make sure that the ‘X-Frame-Options’ in your website is NOT set to ‘sameorigin’, as this will prevent the website from loading in the iframe. This could be a result of the settings in your site, or may be coming from another WordPress plugin that you have installed. If you still face an issue, contact us on support@quickreviewer.com
Adding a Website
Once you have added the plugin or script, log in to QuickReviewer and click the Add New (+ NEW) button in the top left corner of the dashboard. Select ‘Website’ to open the New Website window and select HTTP:// or HTTPS://. Enter your website URL (eg. www.mindwaveai.com) and click the Create button.

The website opens in the QuickReviewer proofing window as it would in the browser. That means all the animations, links and menu navigation remain active. You can add a comment on any page by clicking on the annotation tools (comment icon or rectangle icon) at the top left. Then click anywhere on the page and add your comment.
You can preview website on different screen sizes. Three options in the top right let you choose from three options. Desktop screen sizes, mobile or tablet in portrait or landscape mode. A wide range of options lets you see how the page will look in the device of your choice.

Whether you’re in desktop mode or mobile mode, each screen size lets you add comments to them. So if something doesn’t look right on a specific device, you can ask the designer to modify it.
The QR code option next to the comment icons in the top bar lets you scan the code using your device camera and load the proof on your mobile phone for a real life preview.


